
HBase is a column-oriented database management system that runs on top of Hadoop Distributed File System (HDFS). It is well suited for sparse data sets, which are common in many big data use cases.
Unlike relational database systems, HBase does not support a structured query language like SQL; in fact, HBase isn’t a relational data store at all. HBase applications are written in Java much like a typical Apache MapReduce application. HBase does support writing applications in Apache Avro, REST, and Thrift.
An HBase system comprises a set of tables. Each table contains rows and columns, much like a traditional database. Each table must have an element defined as a Primary Key, and all access attempts to HBase tables must use this Primary Key.
Avro, as a component, supports a rich set of primitive data types including: numeric, binary data and strings; and a number of complex types including arrays, maps, enumerations and records. A sort order can also be defined for the data.
Architecture:
In HBase, tables are split into regions and are served by the region servers. Regions are vertically divided by column families into “Stores”.The term ‘store’ is used for regions to explain the storage structure. Stores are saved as files in HDFS. Shown below is the architecture of HBase.

HBase has three major components:
1. Client library
2. Master server
3. Region servers
Regions:
Regions are nothing but tables that are split up and spread across the region servers.
MasterServer :
- It Assigns regions to the region servers and takes the help of Apache ZooKeeper for this task.
- Handles load balancing of the regions across region servers. It unloads the busy servers and shifts the regions to less occupied servers.
- Maintains the state of the cluster by negotiating the load balancing.
- Is responsible for schema changes and other metadata operations such as creation of tables and column families.
Region Server:
The region servers have regions that -
- Communicate with the client and handle data-related operations.
- Handle read and write requests for all the regions under it.
- Decide the size of the region by following the region size thresholds.
ZooKeeper:
ZooKeeper is a high-performance coordination service for distributed applications(like HBase). It exposes common services like naming, configuration management, synchronization, and group services, in a simple interface so you don't have to write them from scratch. You can use it off-the-shelf to implement consensus, group management, leader election, and presence protocols. And you can build on it for your own, specific needs.
HBase relies completely on Zookeeper. HBase provides you the option to use its built-in Zookeeper which will get started whenever you start HBAse. But it is not good if you are working on a production cluster. In such scenarios it's always good to have a dedicated Zookeeper cluster and integrate it with your HBase cluster.
Installation:
Step 1: Download the Hbase from http://www-eu.apache.org/dist/hbase/1.4.2/

Step 2: Open Terminal and login to the user you have created while installing hadoop. I have named hduser so i will login as
su - hduser
Step 3: Start Hadoop.
start-dfs.shstart-yarn.sh
Step 4: Copy the downloaded hbase file to hduser folder
sudo cp /home/tanmay/Downloads/hbase/hbase-1.4.1-bin.tar.gz /home/hduser/
Extract the file
tar -xvzf hbase-1.4.1-bin.tar.gz
Step 5: We will move this folder to usr/local and create a new folder named hbase.
sudo mv hbase-1.4.1 /usr/local/hbase

Step 6: Edit ./bashrc
sudo gedit ~/.bashrc
Go to end and copy these lines
export HBASE_HOME=/usr/local/hbase
export PATH=$PATH:$HBASE_HOME/bin

Step 7: Edit the hosts file
sudo gedit /etc/hosts
edit the second IP and type 127.0.0.1

Step 8: We have to edit hbase-env.sh which is located in conf folder
cd /usr/local/hbase/conf/
sudo gedit hbase-env.sh
We give the java path in this hbase-env.sh
copy export JAVA_HOME=/usr/lib/jvm/java-8-openjdk-amd64

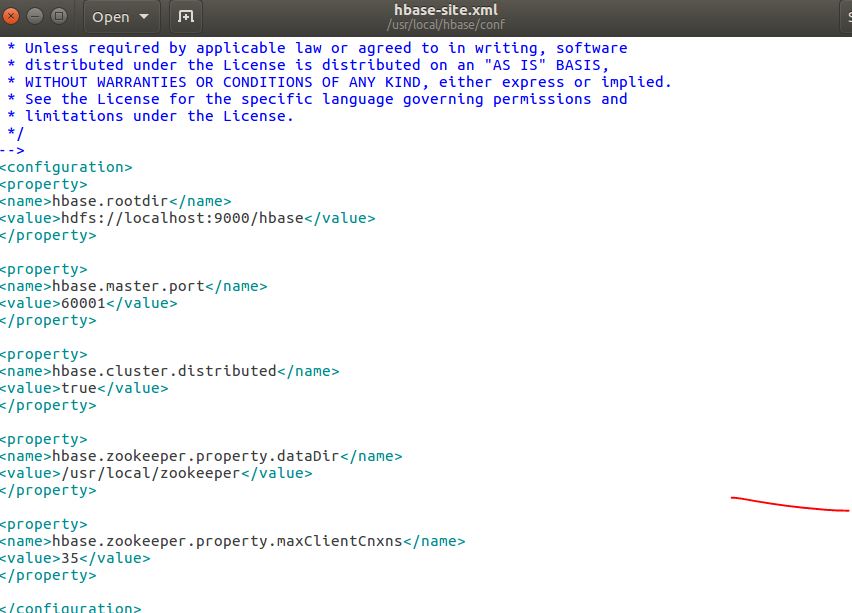
Step 9 : Similarly we edit hbase-site.xml
sudo gedit hbase-site.xml
Copy the following lines
<property>
<name>hbase.rootdir</name>
<value>hdfs://localhost:9000/hbase</value>
</property>
<property>
<name>hbase.master.port</name>
<value>60001</value>
</property>
<property>
<name>hbase.cluster.distributed</name>
<value>true</value>
</property>
<property>
<name>hbase.zookeeper.property.dataDir</name>
<value>/usr/local/zookeeper</value>
</property>
<property>
<name>hbase.zookeeper.property.maxClientCnxns</name>
<value>35</value>
</property>
Paste it in "Configuration".
Step 10: Finally we start Hbase.
cd ..
cd bin/
./start-hbase.sh

Step 11: To check whether hbase is installed properly we type

If all the above nodes are displayed then your HBase is installed Perfectly.
Step 12: For gui display open browser and type localhost:16010

very informative blog and useful article thank you for sharing with us , keep posting learn more Big Data Hadoop Online Course Bangalore
ReplyDeleteThank You!
DeleteGood content. You write beautiful things.
ReplyDeletekorsan taksi
vbet
sportsbet
taksi
hacklink
hacklink
mrbahis
vbet
sportsbet
Good text Write good content success. Thank you
ReplyDeletebonus veren siteler
kibris bahis siteleri
betpark
kralbet
poker siteleri
mobil ödeme bahis
slot siteleri
betmatik
dijital kartvizit
ReplyDeletereferans kimliği nedir
binance referans kodu
referans kimliği nedir
bitcoin nasıl alınır
resimli magnet
HOB
kıbrıs
ReplyDeleteedirne
muş
trabzon
balıkesir
JFF
This is very helpful, thank you!
ReplyDeleteشركة المثالية للتنظيف بالدمام